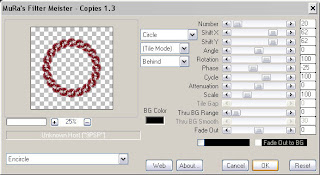
 Click Ok, Adjust-Sharpness-Sharpen, using your magic wand select inside the frame you have just made, Selections-Modify-Expand by 5, Open paper of choice, I used paper 5, Image-Resize to 600x600 pixels, edit-copy, paste as a new layer, Selections-Invert, Hit Delete.
Do Not Deselect, open an image of choice, edit copy, and paste as a new layer, again Hit delete to remove any parts that stick outside of your frame background. Selections-Select None. Add a dropshadow to your image, I used 3-3-34-3 Black.
Right Click on your frame layer in the layer palette, Layers-Arrange-Bring To Top, Make sure your frame layer is active, Open another image of choice, edit-copy, paste as a new layer, i resized mine by 80% and position, add a dropshadow of choice, I used 5-5-57-14.85 Black.
Add any other elements of choice from the kit.
Make the background layer active, Open paper of choice, I used paper 9, Image-resize 600x600 pixels, edit-copy, paste as a new layer onto your tag, Layers-Load/save mask-from disk, WSL_Mask159. Back to your layer palette, right click your mask layer, Layers-Merge-Merge Group.
Add your wordart of choice.
Add your name and copyright.
Save as .png or .jpg however you prefer.
I hope you found this tut easy to follow,
Any problems please let me know.
I would love to see your results.
Luv Jo.xx.


No comments:
Post a Comment