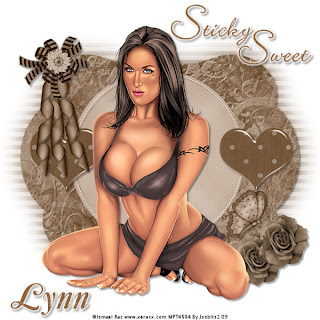
Supplies Needed:
Image Of Choice-I am using the artwork of Ismael Rac you can purchase here
Scrapkit FTU - Totally Chocolate By Lynn of Poundstore Scraps here
Template By Missy tagtemplate102 here
Wordart By Blissfully Beth here
Font PTU-Caslon No 540 Swash
Plugins:(Optional)
Lokas Software-Gel You can get the demo here
VM Extravaganza - Transmission here
Ok Lets Go.
Open template "Shift D" to duplicate, Close original template layer, Delete the watermark layer,
Select Background layer, Image-Resize- change to pixels, 600 width, Lock aspect ratio ticked, Resize all layers ticked. Click ok. Image-Canvas size 600x600 pixels, lock aspect ratio NOT ticked, Placement - middle centre, Click Ok, Selections-Select All, Floodfill White.
Select shape layer, Selections-Select All, Selections-Float, Selections-Defloat, Open paper of choice, I used paper 3, Image resize 600x600 pixels, edit-copy, paste as a new layer onto your tag, Selections-Invert, hit delete, Selections-Select None. Delete original shape layer.
Do the same with the circle layer, but this time I used paper 9, Delete original circle layer.
Select dotted circle layer, go to Adjust-Sharpness-Sharpen, add a dropshadow of choice, I used 3-3-34-3 Black.
Select hearts layer, Selections-Select All, Selections-Float, Selections-Defloat, Open paper of choice, I used paper 2, Image resize 600x600 pixels, edit-copy, paste as a new layer onto your tag, Selections-Invert, Hit Delete, Select None. Delete the original hearts layer.
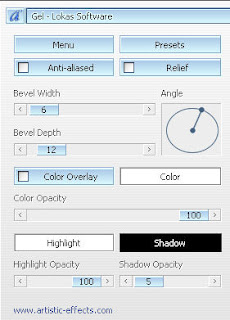
I also applied Lokas Software - Gel on the hearts with the settings shown below, Apply a dropshadow of choice, I used 3-3-34-3 Black.

Apply the same dropshadow to Raster 1.
Make Raster 3 (hearts) active, Open image of choice and paste as a new layer, position and apply dropshadow.
Add wordart of choice, I used the selections-select all process and used paper10, and a gradient glow and dropshadow, or just dropshadow however you prefer.
Select raster 1 layer, Layers-Duplicate, Make original raster 1 the active layer, Go to Adjust-Blur-Gaussian Blur, Radius 20.00. Click Ok. Then Effects-Plugins-VM Extravaganza-Transmission, with these settings:-
Line Width 6
Offset 0
Contrast 40
Add any other embellishments of choice from the kit.
Add name and copyright.
Save as .png or .jpg however you prefer.
I hope you found this tut easy to follow,
Any problems please let me know.
I would love to see your results.
Luv Jo.xx.


No comments:
Post a Comment