Supplies needed:
Tube of choice- I am using the fantastic art of Keith Garvey you can purchase Here
Tube of choice- I am using the fantastic art of Keith Garvey you can purchase Here
Scrap kit is FTU called Valentine By Bluey @ Bluedream Designs Here
Plugins.
DSB Flux - Bright Noise.
O.K Let's Go
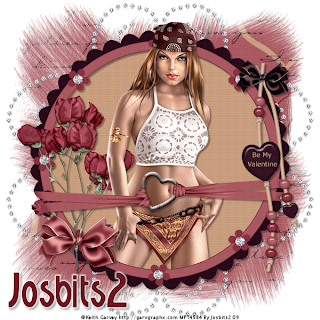
Open a new Image 600x600 white,Open BD-Valentine-frame2 and paste as a new layer, I resized mine by 90%, magic wand select inside the frame,selections-modify-expand by 3.Open paper of choice, I used BD-Valentine-paper 3, edit-copy, Back to working layer and paste as a new layer, selections-invert-delete-select none.Move this layer below your frame.
Open your image of choice and paste as a new layer, I resized mine by 90%, see above tag for placement, delete any bits that overhang on your frame at the bottom, To do this I activated my frame layer then went selections-select all, selections-float, selections defloat, then I activated my image layer and deleted any overhang.Apply dropshadow I used 3-3-34-3 Black, then reactivate the frame layer and selections-select all, selections-float, selections-defloat, activate your tube layer and delete any dropshadow overhang. Select None.
Open BD-Valentine-Heart Ribbon1 and paste as a new layer, I resized mine by 90%, Activate the frame layer and Selections-select all, selections-float, selections-defloat, selections-invert.
Re-activate the ribbon layer and delete any overhang from the sides of the frame on both sides.Select the burn tool, my settings are round, size 25, hardness 50, step 10, density 100, thickness 100, rotation 0, opacity 30. run the burn brush over the edges of the ribbon where they wrap round the frame.Dropshadow your ribbon and frame layer I used 3-3-34-3 Black.
Make ribbon layer active, open you BD-Valentine Charm1, edit-copy, back to working image and paste as a new layer, I resized mine by 80% and moved mine to the right hand side of the tag-check above for placement. Dropshadow same setting as before.
Open BD-Valentine-Bow2, edit-copy, paste as a new layer onto your tag, I resized mine by 40% and placed over the staples of the charm, adjust-sharpness-sharpen,Dropshadow as before.Open BD-Valentine-flowers1 and copy and paste as a new layer resize to your liking i resized by 80%, I moved this layer above the frame but below the image and the ribbon, I then duplicated the flower and Image Mirror, then moved it back to original flower so it looked like one, add dropshadow to both flower layers then merge these two layers together.
Open BD-Valentine-Bow1, copy and paste as a new layer above the ribbon layer, I resized mine by 60%, adjust-sharpness-sharpen, and dropshadow.Make the Background layer active and paste BD-Valentine-Paper8 as a new layer, Layers-Load/Save mask-from disk WSL_Mask116, delete the black mask layer and click yes on the pop-up box, then right click the mask merge-merge group.
Open the BD-Valentine-Diamond Doodle1 and paste as a new layer above the mask layer, Image resize by 80%, Click on the eye for raster 2 in your layer palette, (You will now see your diamond doodle, move top right, when happy with placement, layers-duplicate, Image-Mirror. Layers-Merge-Merge Down. Then duplicate this merged layer, Image-Flip, Layers-merge-merge down.
Reopen the raster2 layer by unticking the eye.Make Raster 9 the active layer and duplicate twice for a total of 3 layers, make the copy 2 of raster 9 active, go effects-DSB Flux - Bright NoiseIntensity 36, make sure mix is highlighted and click mix 2 times.Activate copy of raster 9 layer and go to Effects DSB Flux Bright Noise, same settings but this time click mix 3 times.Activate Raster 9 DSB Flux-Bright Noise Click Mix 4 times.
Add your name and correct copyright.
To Animate.
Make raster 2 the active layerx out copy of raster 9 and raster 9.Go to Edit-Copy Special-Copy Merged.
Open Animation Shop Edit-Paste-As a new animation.
Go back to PSP x our copy 2 of raster 9 and re-open copy of raster 9, Edit-Copy Special-Copy Merged.
Back to Animation Shop Edit-Paste-After Current frame.
Back to PSP x out copy of raster 9 and reopen raster 9, Edit-Copy Special-Copy Merged.
Back To animation shop Edit-Paste-After Current Frame.
Save as a .gif file and your done.
I hope you found this tutorial easy to follow,
any problems please don't hesitate in letting me know below.
I would love to see you results.
Luv Jo.xx.


No comments:
Post a Comment